
Technique Project #21:
Inspired by Cubism
Inspired by Cubism
|
Goal of this project
To begin playing with the idea of "informed abstraction". How do we look at something and play with its "real" qualities, while introducing new concepts of space & perspective in our art work? |
Supplies Needed
Rives BFK Paper Your Drawing Board Ruler Charcoal Rags Art Gum Eraser Object with visual and personal interest |
Step-by-Step Instructions
1. Start by drawing light lines with the vine charcoal and ruler to divide the space on the paper.
2. Once the space is adequately broken up, draw pieces from your object interacting with the lines. Keep the shapes simplified.
3. Consider varying the scale of the objects pieces/parts, varying the perspective (what angle are you looking at this from) , and also varying the value (light & dark) in the drawing.
4. Use your cloth rag to soften and blend the lines. Fill in whole areas to create darker values, then use the cloth to soften those values as well.
5. Use the art gum eraser to create sharp, crisp lines where you want.
6. Add & subtract value (lightness and darkness) with your tools & materials to create depth and interest.
7. Allow your piece to evolve over time, going back and forth to balance the composition. This project is not a one way street, but rather a back and forth conversation of evolving abstraction with realism.
8. Move your object around at least once, maybe more, to begin drawing it from multiple perspectives.
9. Continue working in layers and back and forth across the piece until you feel like you have gotten it just right. This could take multiple drawing sessions.
Artistic Food for Thought
Look up the work of Cubism and see who created this style of art!
Look up the work of Cubism and see who created this style of art!
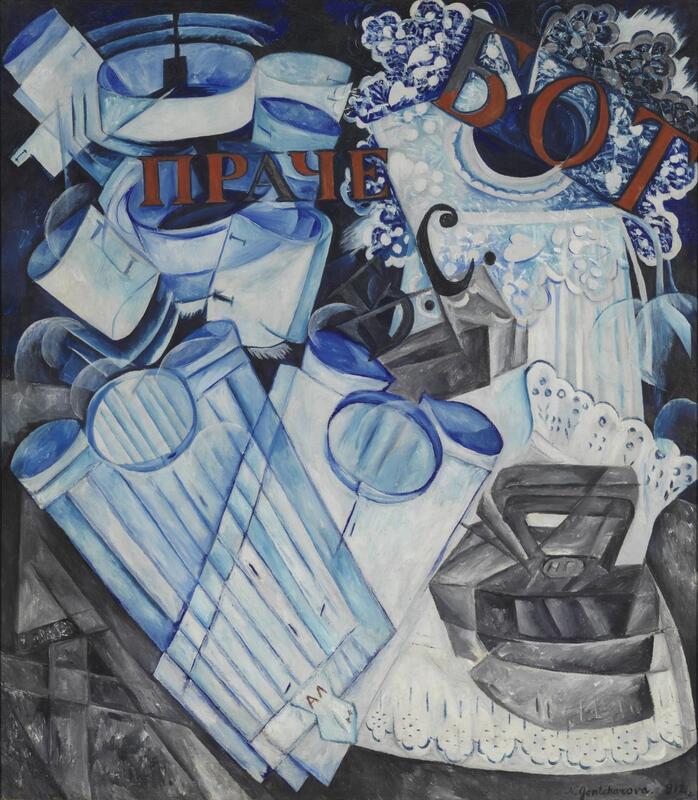
Linen Natalia Goncharova 1913
|
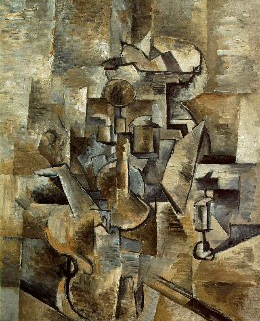
Violin & Candlestick George Braque 1910
|
Technique Project #22:
Tribute to an Artist you Admire
Tribute to an Artist you Admire
|
|
Supplies Needed
Drawing Board Pencils Tracing Paper Images of the artist and their work Paint Paintbrushes |
Step-by-Step Instructions
1. Research an artist that you admire, who inspires you and you would like to spend some time studying their work.
2. Trace a portrait of the artist on tracing paper.
3. Use the method of transferring the image we practiced in earlier lessons, by drawing over the lines again on the opposite side (the back) of the tracing paper making sure there is enough graphite covering each line.
4. Adjust the layout on your paper and transfer the image by retracing your original drawing.
5. Repeat steps 2-4 with the images of their artwork that you would like to include in your composition. Think about balancing this as an overall design (i.e. how do all of these shapes flow together in balance and harmony?)
6. You can begin the painting by doing a wash of the background areas in complimentary colors if you would like, and then begin on the details of the different sections of the painting you would like to focus on next.
7. You can copy or emulate the artist's work to the best of your ability, while creating a whole new piece based on their work and their portrait.
Design Challenge #11: Collage & Mixed Media inspired by Henri Matisse
|
|
Supplies Needed
Your Visual Journal or Drawing Paper Scrap Paper X-Acto Knife & Scissors Rubber Cement Paint |
Step-by-Step Instructions
1. Paint paper scraps with various colors and let dry. This could be a great way to use up leftover paint from other projects! You would have a collection of these painted scrap papers over time.
2. Optional: Sketch out your design before cutting the pieces for your collage.
3. Using rubber cement, brush the back of each piece of paper with glue and also the area you are adhering it to. Let both of those areas dry first before putting the pieces together.
4. Adjust pieces as you go to create movement and interest. Consider color, balance and shape to create a successful composition.
5. Explore and have fun with this design challenge!
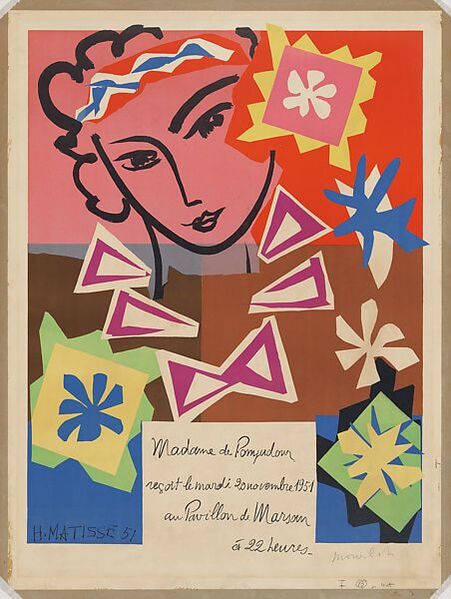
Madame de Pompadour Pavillon de Marson
Henri Matisse Lithograph 1951 |
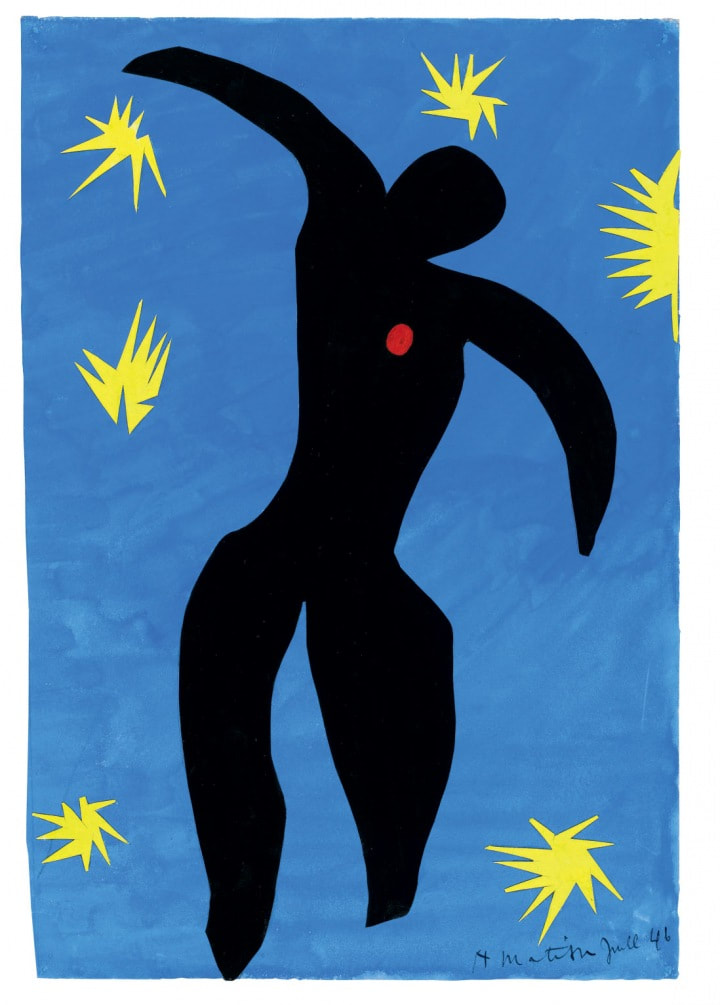
Icarus Henri Matisse
Cut Paper 1946 |
Art Talk #11: Developing Your Visual Language
You can listen to this art talk in the video below!
You can go through the slides for this art talk at your own pace here!
