Technique Project #19:
Cross Contour Line Drawing
Cross Contour Line Drawing
|
|
Supplies Needed
Your drawing pencils preferably H or HB (I am using 4B in the video for visibility purposes) Drawing Paper Your ruler Your Gum Eraser Drawing Board |
Goal of this project
In this project we want to increase our artistic understanding of surface and volume.
In this project we want to increase our artistic understanding of surface and volume.
Step-by-Step Instructions
1. Begin drawing an object by starting at one singular point. In the demo video I am showing you Cross Contour technique by practicing drawing your own hand. This is the the easiest way to get started on this technique.
2. Draw the object's surface by using your pencil to draw lines contouring the shapes of the surface, much like "Art Ant", an ant that leaves a line as he walks back and forth across an object's surface.
3. Slowly work across the paper, filling in the surface of the object, studying the form and its shape.
4. Continue drawing in this manner, which is designed to train your brain in making important connections about studying surfaces & the mass/volume of an object, which will help in drawing realistically.
5. Take breaks if needed as this is a tedious type of drawing process and make certain not to strain your eyes or yourself from concentrating too hard.
6. Adjust as necessary by just adding onto the drawing. Cross Contour Line Drawings are all about learning about the volume and surface of a subject matter.
Technique Project #20: Painted Portrait inspired by artist Richard Diebenkorn
|
|
Supplies Needed
Drawing Board Blue, Red, Yellow, & White Acrylic Paints Paint Brushes Water Cup & Paint Rags Prepared Painting surface Floor Length Mirror & Chair set up for Self-Portrait |
Step-By-Step Instructions
1. Start with a background color, blocking out the shape of the figure in the negative space.
2. Begin blocking in the main shapes of the figure and the chair.
3. Adjust as you go to the correct for accuracy.
4. Stay loose to emulate the style of Richard Diebenkorn.
5. Consider all parts of the figure as a simplified shape.
6. Continue working until you are satisfied with the piece.
Additional Resources
Take a look at Richard Diebenkorn's paintings!
Take a look at Richard Diebenkorn's paintings!
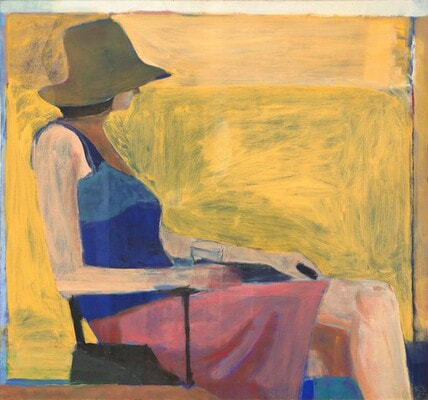
Seated Figure with Hat Richard Diebenkorn
1967 Oil on Canvas 57x61 |
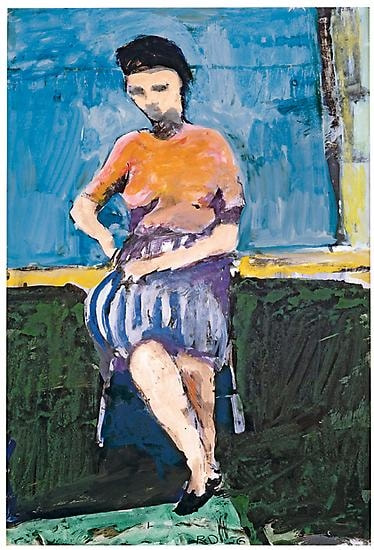
Untitled Richard Diebenkorn
1956 Gouache and ink on paper 16x10 inches |
Design Challenge #10:
Layering Line Drawings
Layering Line Drawings
|
|
Supplies Needed
Your Visual Journal or Drawing Paper Objects to trace Watercolor Paints & Brushes Containers filled with water Drawing Pencil |
Step-By-Step Instructions
1. Start by selecting an object and begin tracing the objects in many ways across the paper. Layer the positions.
2. Pay attention to the movement of the drawing.
3. Use the watercolors to start painting in the objects with different colors.
4. Consider color, pattern, composition, movement and shape when composing the drawing and filling with paint.
5. After filling in the objects, begin to paint the background, using multiple colors or values to add interest/depth.
6. Add more layers as needed to sharpen the painting up or to saturate the colors more.
7. Use this technique to practice before working on larger painting of objects. It can help to unlock new compositions and ideas about the object that as it allows you to play around with then object first.
Additional Resources
Take a look at some art work by Jim Dine!
Take a look at some art work by Jim Dine!
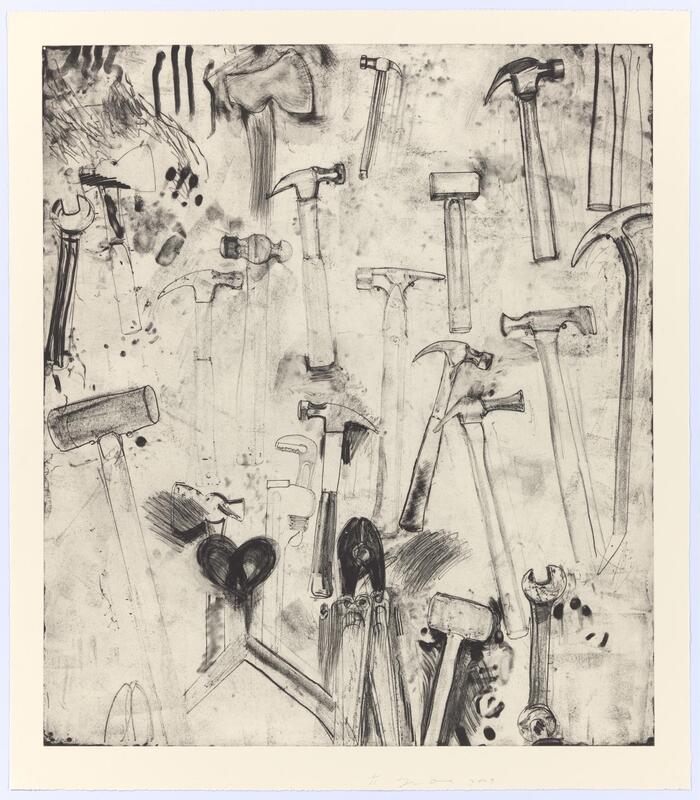
A wall of tools; objects of desire Jim Dine
Etching on paper 2009 |
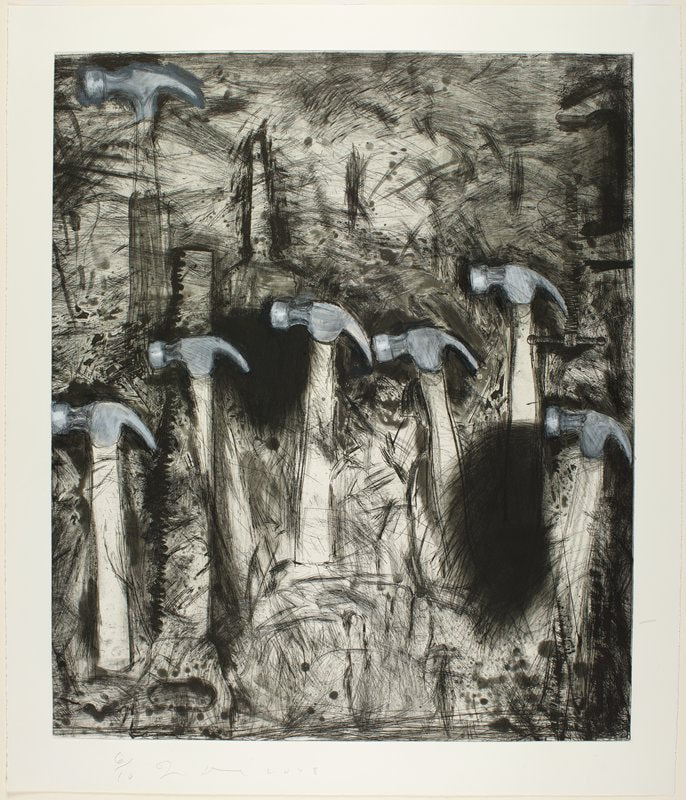
Seven White Hammers Jim Dine
Aquatint on paper 2008 |
Art Talk #10: The Subtle Nature
of Color & Line
of Color & Line
Listen to this art talk lesson by watching the video below!
You can also go through the slides for this art talk below at your own pace!
